How to Make a Bûche de Noël (Yule Log Cake)
Impress your guests (and yourself) this year by making a traditional yule log cake. It's easier than it looks, and as sweet as it is stunning. Yule be singing its praises!
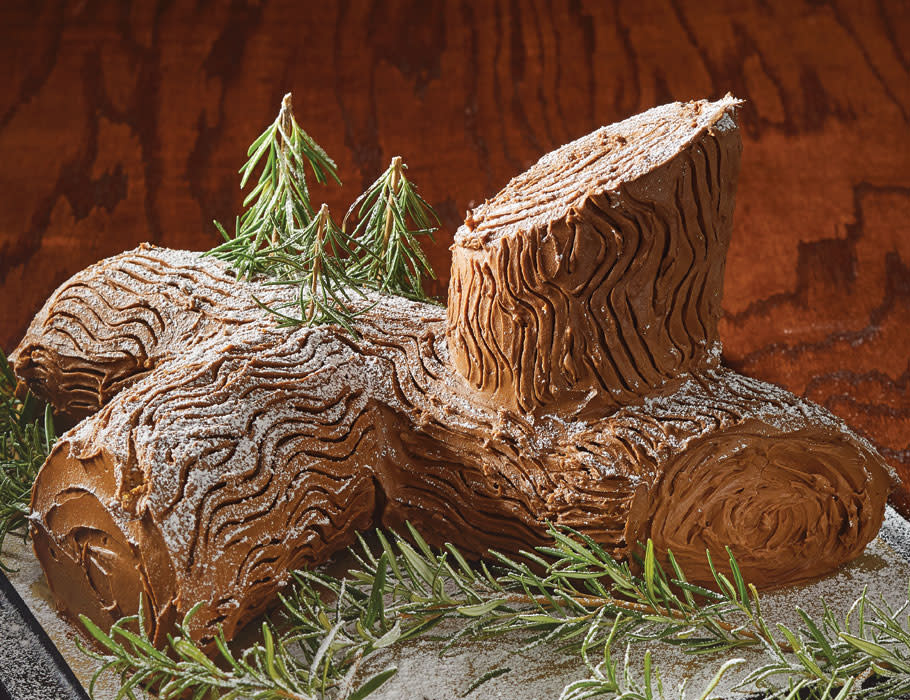
The Yule Log: A Sweet Centerpiece
Impress your guests (and yourself) this year by making a traditional yule log cake. Simply spread jam onto a classic sponge cake, roll, and cover with a simple chocolate frosting for a cake that's as delicious as it is stunning. Yule be singing its praises!
Why a Log?
Bûche de Noël is a traditional Christmas cake that’s shaped like a log and makes an impressive centerpiece for your holiday table. But why a log? The cake harkens back to the Germanic Yuletide tradition of burning an actual log during the winter solstice to celebrate the return of the light of the sun and the coming of the new year. The yule log eventually became a Christmas Eve tradition in Europe and America, and in the 19th century, the log-shaped cake emerged in France and became a sweeter new version of the old tradition throughout the west.
It may look intimidating to make, but it's really not — and it’s certainly both easier and much safer than dragging a log into your house to burn! So celebrate the sunnier days ahead with a treat that’s as tasty as it is adorable. We'll walk you through making a yule log cake, step by step.
Step 1: Make the Cake, Filling, and Frosting
First of all, you'll need our recipe for Almond-Raspberry Bûche de Noël with chocolate frosting. Follow along to make the cake, filling, and frosting.
The cake batter comes together in a snap. The "hardest" part is whipping egg whites and folding them into the batter.
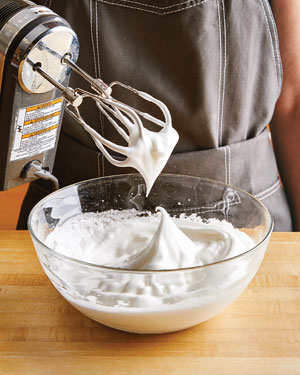 Whip eggs whites to stiff peaks. You
know you’re close when the whites are
moist and glossy. If they look dry or
chunky, you’ve whipped them too far.
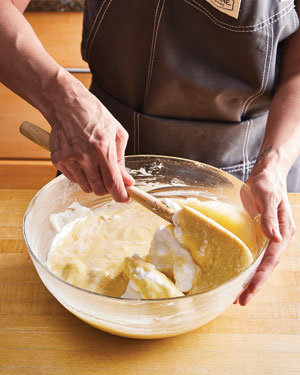 “Sacrifice” one quarter of the
whipped whites by whisking into
the batter to loosen, then fold in the
remaining whites in three batches.
Step 2: Roll & Shape the Cake
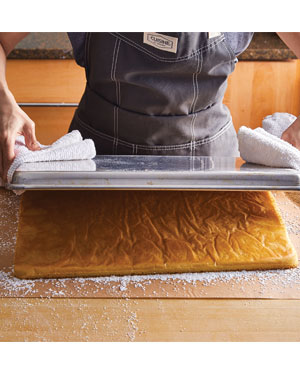 To prevent sticking, and absorb moisture, turn the cake out onto a sheet
of parchment that’s been sprinkled with powdered sugar. Remove the
parchment used for baking, then sprinkle the second side of the cake as well.
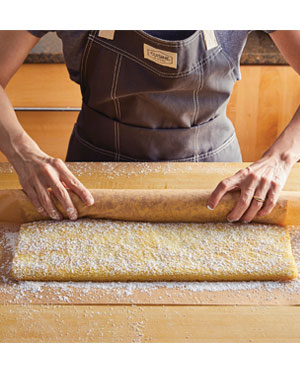 Roll up the cake, along with the parchment, starting on one long side,
while it’s still warm. This helps the cake hold the rolled shape as it cools.
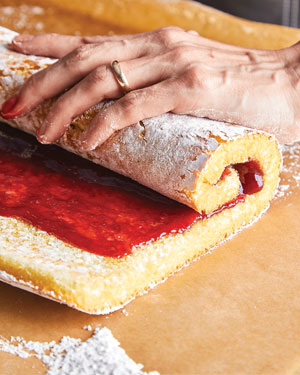 Spread jam over the surface of the cake, leaving the last inch
uncovered on one long side. As you roll the cake up with the jam,
excess jam will be pushed out to cover the remaining cake.
After spreading jam on the cake, roll it into a log. Simple, right? Now the fun part begins — the assembly.
To create the “knots," cut off both ends of the cake at about a 45-degree angle ... no need to bust out your protractor here, it’s meant to look natural. Next, you’ll adhere the "knots" to the log; one on top, one on the side. All it takes is a bit of frosting and some long toothpicks to secure them.
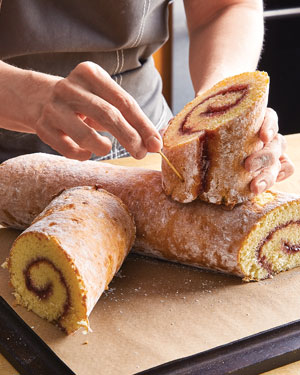 After slicing the ends off
the cake roll, adhere them
to the main section of cake
with frosting, then use long
toothpicks to secure the
ends further.
Step 3: Frost & Decorate
Once that's done, spread a thin layer of frosting over the entire cake, then chill until set for more stability. Finally, spread on the remaining frosting, sprinkle the cake with powdered sugar, and run a fork through it to give the cake’s exterior a bark-like texture. Want to gussy up the cake a bit more? Fresh rosemary sprigs make a pretty accent.
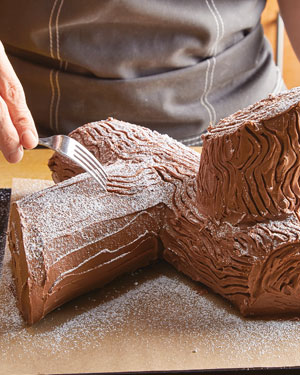 Once the cake is frosted,
sprinkle it with powdered sugar,
then drag the tines of a fork
through the icing to give the
exterior of the cake the look
of tree bark.
The result: One impressive cake you'll be proud to show off to all your guests. This is such a fun cake to make and decorate, and it's endlessly customizable by simply changing jam and extract flavors.
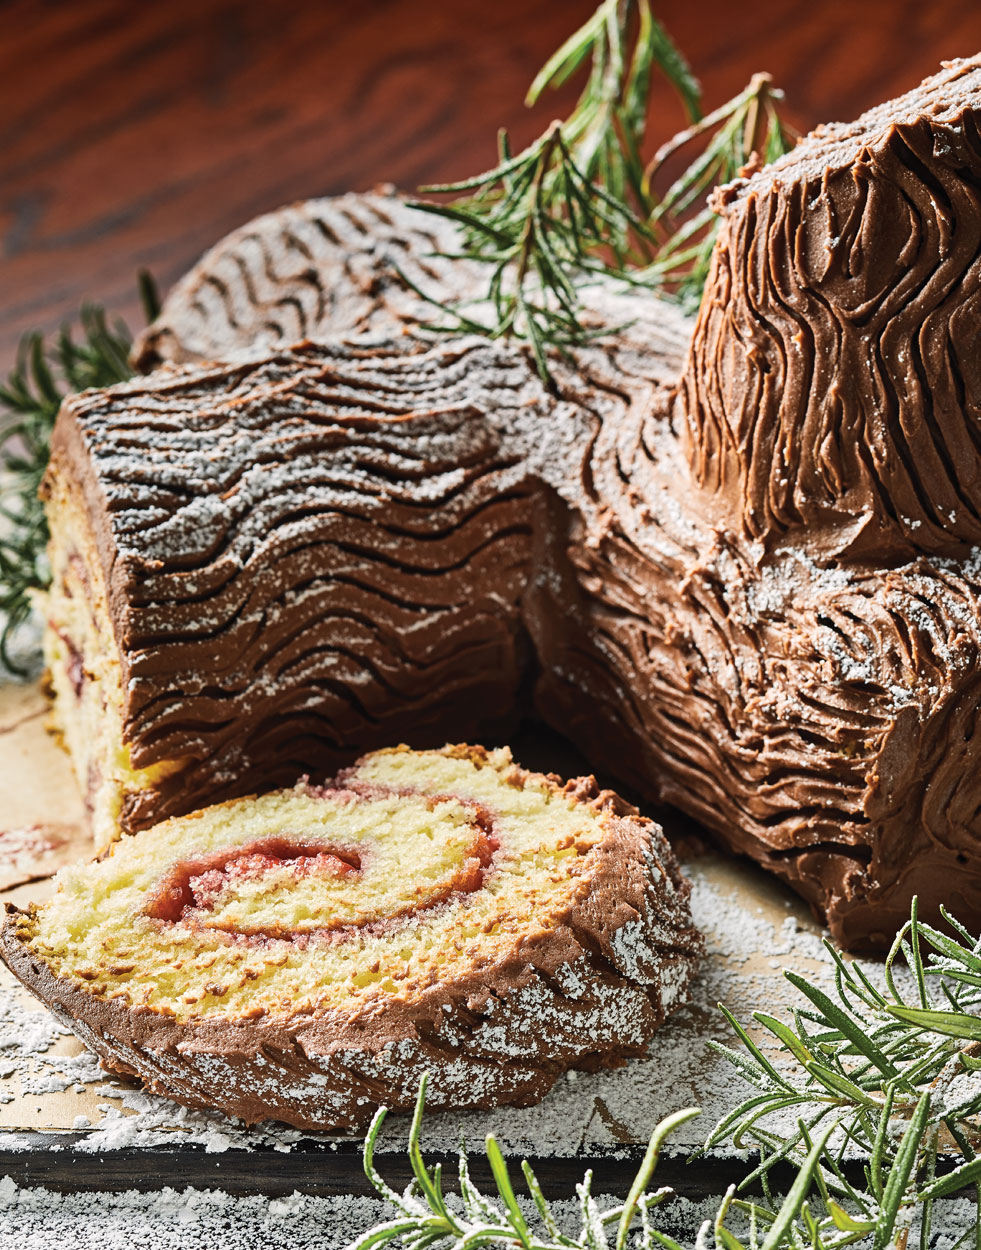
Grab the recipe for our Almond-Raspberry Bûche de Noël with chocolate frosting.
Check out more of our holiday desserts!
Product Recommendations
Interested in cooking? Need some supplies?
Check out some of the tools we like. All products featured on Cuisine at Home are independently selected by our editors; we may earn an affiliate commission from qualifying purchases through our links.