How to Make a Gingerbread House
Impress everyone you celebrate with this season by showing off your master building skills thanks to step-by-step photos and easy-to-follow directions for a gingerbread house of your very own.
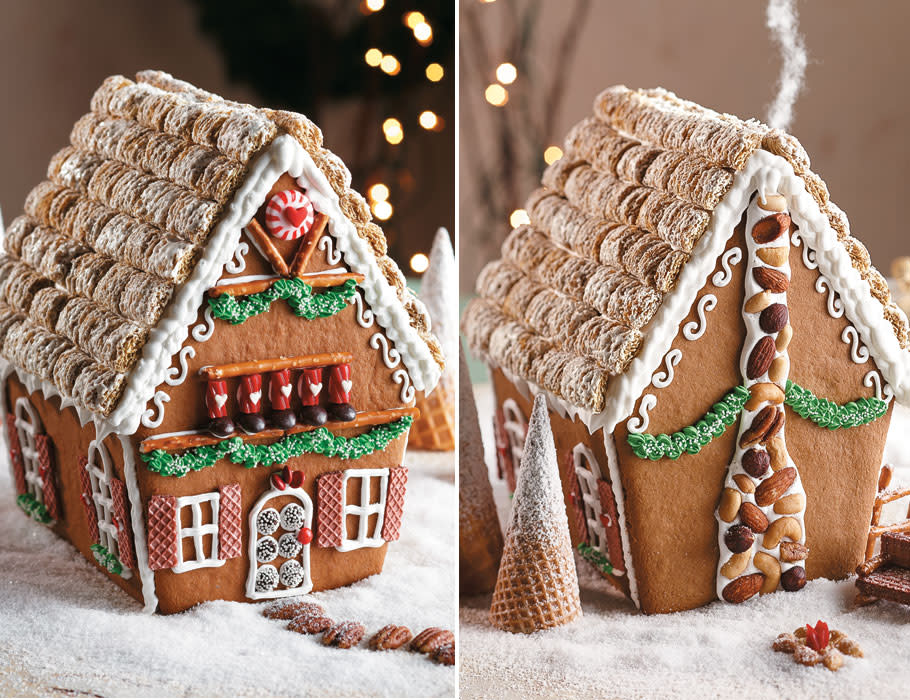
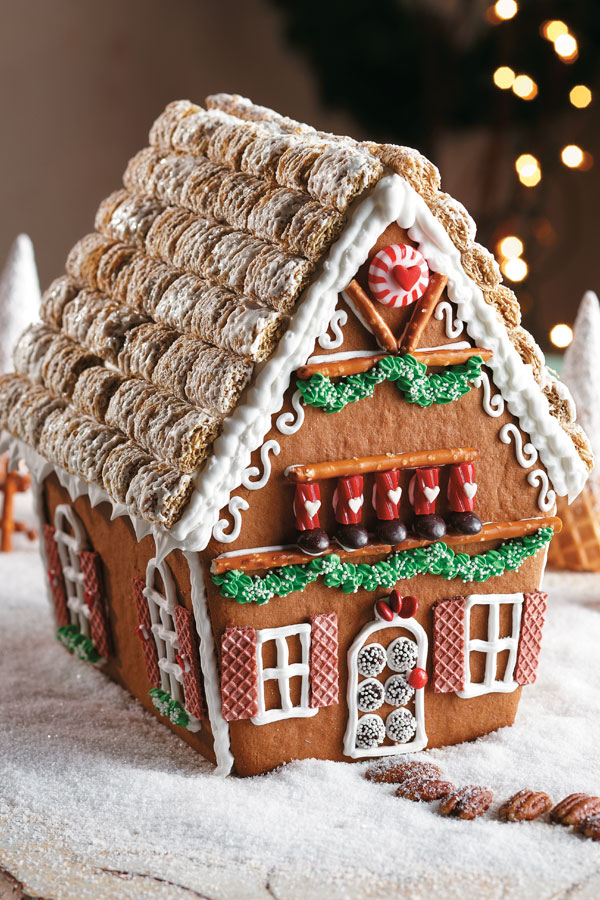
Bring out the child in everyone when you place this adorably cute and deceptively simple Hansel & Gretel-style Gingerbread House in the center of your table. It truly is a home for the holidays
While this gingerbread house is easy to build, just like with any project, proper planning will make things run much more smoothly. After you’ve baked the pieces according to the Gingerbread House recipe directions, follow these plans for decorating and assembling.
Before starting, you'll need to print and cut out the pattern pieces from our downloadable PDF. You'll also need to find a large platter, a baking sheet, or even a piece of plywood to use as a base, then build the gingerbread house on it. Once the house is assembled, you won’t be able to move it unless you’ve done so on a sturdy base.
You can make, bake, decorate, and assemble this gingerbread house in stages over the course of several days.
Tips for Gingerbread House Success
Follow these tips for the sturdiest, best-looking gingerbread house possible.
-
Apply any decorations to the front, back, and side pieces before assembling.
-
Allow any additions attached with royal icing to dry before moving.
-
Set a scene with landscape elements, like sugar cone trees, pine boughs, or cinnamon stick log bundles.

How to Build a Gingerbread House
Step 1: Prepare Gingerbread Dough
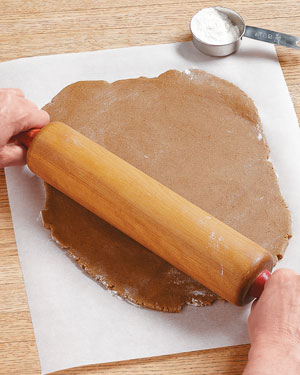 Prepare gingerbread dough according to Gingerbread House recipe instructions. Divide dough in half, wrap each half in plastic, then chill 3–4 hours. Roll one dough half on floured
parchment paper to ¼-inch thick.
Step 2: Cut Out & Bake Pieces
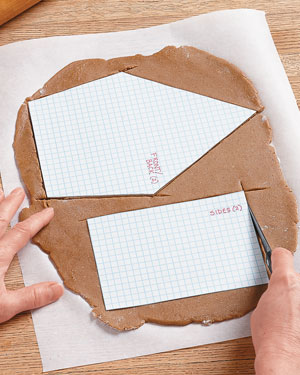 Preheat oven to 375°.
Arrange two pattern pieces on dough, with at least ½-inch between pieces, then cut around patterns with a sharp knife. Remove, cover, and chill excess dough.
Slide parchment with dough cutouts onto a large cookie sheet.
Bake cutouts until firm in center, 8–10 minutes. Repeat process with remaining dough and scraps until all six pieces are rolled, cut, and baked.
Step 3: Trim Baked Pieces
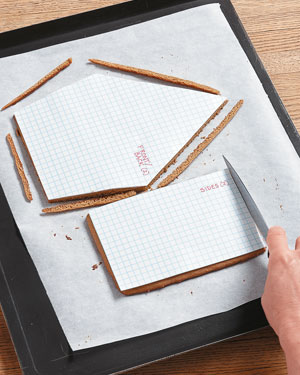 Arrange matching pattern pieces
on top of baked cutouts, then
carefully trim with a sharp knife
for straight, even edges. Remove
pattern pieces, then return cutouts
to oven until dry and lightly
browned, 2–4 minutes more.
Transfer parchment with cutouts
to a rack to cool completely
Step 4: Decorate the Windows, Door & Trim
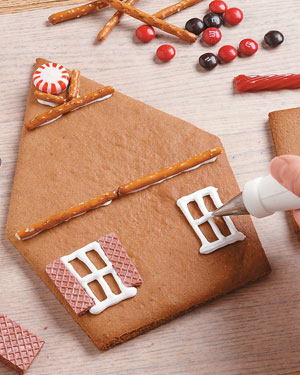 Pipe windows and door on front
and side pieces on a flat surface in
white icing with a small straight tip.
Add pretzels and candy trim using white icing as glue.
Split wafer cookies in half with a knife, trim to fit, and press onto both sides of each window for shutters. (Outer shutters may not be flush with walls.)
Step 5: Decorate the Chimney
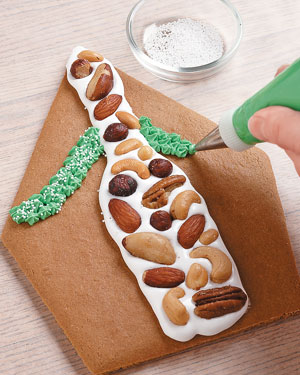 Pipe chimney on back piece on
a flat surface in white icing with a
large straight tip, making it wider
at the bottom. Press mixed nuts
into wet icing for stones.
For garland, pipe green icing into swags with a small star tip on front and back pieces. Let all icing dry before beginning assembly, about 2 hours.
Step 6: Assemble the House
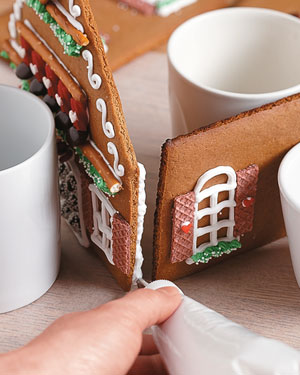 To assemble line up front of
cottage and one of the sides, so the
side meets just behind the edge
of front piece. Pipe a bead of white
icing along inside edge of front
piece and attach edges to form
a corner. Hold pieces in place with
heavy mugs until dry, 1–2 hours.
Repeat piping with other side,
then attach back cottage piece.
Step 7: Add Roof & Shingles
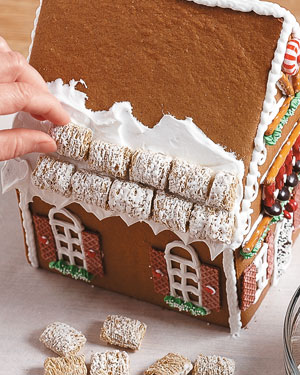 When walls dry, attach roof pieces
with icing beads. (Bottom edge
of roof will hang over.)
When roof pieces are dry, pipe or spread white icing over only half of roof surface. While still wet, start at bottom edge, and top with shredded wheat cereal pieces, staggering them and using cut pieces at row ends. Repeat until roof is covered.
Love baking? Check out all of our holiday dessert recipes, here!
Product Recommendations
Interested in cooking? Need some supplies?
Check out some of the tools we like. All products featured on Cuisine at Home are independently selected by our editors; we may earn an affiliate commission from qualifying purchases through our links.